A lot of the work we do at Benevolent is powered by the insights and relationships we extract directly from scientific literature. We ingest, normalize and process millions of papers.
The information discovered from these papers is used heavily in our drug discovery programs: from being used as features for Machine Learning driven target identification, to highlighting the best evidence to show directly to our drug discovers as they triage potential targets.
The pipeline that processes our corpus of literature isn’t simple. We use multiple NLP techniques, from rule based systems to more complex AI systems that consider over a billion sentences. This pipeline must be robust, fast, and flexible; our AI Researchers and Data Scientists need the freedom to experiment and try out new ideas across the corpus quickly and easily. To this end, the majority of our pipeline leverages two pieces of technology: Apache Spark and Kubernetes.
Why Spark?
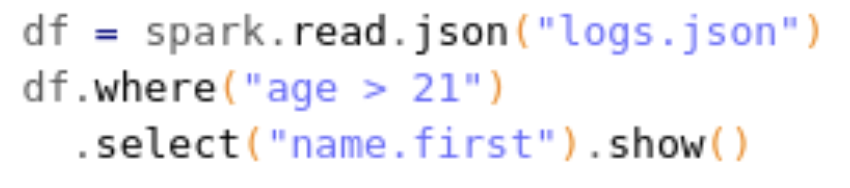
The Spark Python DataFrame API exposes your data as a table/dataframe, in a similar way to pandas.
Spark DataFrames have a number of great features, including support for schemas, complex/nested types, and a full featured API for transforming datasets. Spark also supports UDFs (User Defined Functions), which allows us to drop into custom Python functions and transform rows directly in Python. This allows more complex data transformation to be expressed in Python, which is often simpler and allows the use of external packages.
But the best feature of Spark is its incredible parallelizability. A Spark script will run equally well on your laptop on 1000 rows, or on a 20 node cluster with millions of rows. It’s at the heart of everything Spark does, and it just works. There are a number of options for how to run Spark on a multi-node cluster; at Benevolent, we’ve opted to run on Kubernetes.
Why Kubernetes?
Kubernetes is at the heart of all the engineering we do at Benevolent. We made the decision to run everything on Kubernetes very early on, and as we’ve grown, our use of Kubernetes has grown too. We’ve moved from a cluster running in a cupboard on-premises, to off-site server space, to multiple AWS EKS clusters. Everything is Dockerised, and everything runs on a Kubernetes cluster: our internal web apps, our CI/CD pipelines, our GPU jobs, and our Spark pipelines.
But it wasn’t always like this. Until about a year ago, we ran our Spark pipelines on AWS’s managed platform for Spark workloads: EMR.
The Dark Ages
EMR is pretty good at what it does, and as we only used it for Spark workloads we didn’t even scratch the surface of what it can do. That being said, there were a number of issues we found with EMR, which eventually led us to move our Spark workloads to Kubernetes. Some of these issues might have been solved since we moved.
Issues we encountered with EMR:
- No support for using Docker Images.
- Logs were in a nest of S3 paths.
- Startup times for a cluster were long, especially when rebuilding the AMI/Image.
- Pipelines were defined in JSON, which got clunky with complex pipelines.
- Experimentation was not easy, as long startup times meant quick iteration was impossible.
As our Spark pipelines got longer and more complicated, we found EMR getting more difficult to use. While we were building more tooling on top of EMR, the rest of the company was sharing tools and improving on their use of Kubernetes. This finally led us to investigating if we could run Spark on Kubernetes.
The Renaissance
Spark on Kubernetes is a simple concept, but it has some tricky details to get right. In general, the process is as follows:
- A Spark Driver starts running in a Pod in Kubernetes.
- The Driver contacts the Kubernetes API server to start Executor Pods.
- The Executors connect to the Driver and start work.
From there, the process continues as normal. As mentioned though, there are some specific details and settings that need to be considered when running Spark on Kubernetes.
Client vs Cluster mode
Spark has two modes for running on an external cluster: client and cluster mode. Cluster mode is the simplest, where the spark-submit command simply starts a Driver Pod inside the cluster, then waits for it to complete. However, we found this had a flaw - if the Spark job failed for any reason, the Driver Pod would exit with an exit code of 1, but the spark-submit command wouldn’t pass that failure on, and exited with an exit code of 0. This meant we had no way of capturing if a job had succeeded or failed, without resorting to something like inspecting the logs.
Client mode, on the other hand, runs the Driver process directly where you run the spark-submit command. This means setting a lot of the settings on the Driver Pod yourself, as well as providing a way for the Executors to communicate with the Driver. However, you get complete control over the Pod which the Spark Driver runs in.
Service Discovery
Once running in client mode, the Executors need some way to communicate with the Driver Pod. Headless services are perfect for this, as you can start a single service, match the selectors on the service and the Driver Pod, then access the Pod directly through its hostname. We’ve found headless services to be useful on a number of occasions - see the official Kubernetes documentation for a full explanation.
S3 access
S3 is the backbone of all the data we have at Benevolent. Spark uses the Hadoop file system to access files, which also allows access to S3 through the AWS Java SDK. This has two parts:
1) Access credentials setup for S3 access.
2) Choosing the right implementation of the S3 protocol to allow efficient access to data from Spark Executors.
Access credentials can be solved in various ways in Kubernetes and Spark.
- The simplest is to set up raw AWS credentials in Kubernetes secrets, and then supply these to the Spark Driver and Executors via environment variables.
- An alternative to this is to use IAM roles that can be configured to have specific access rights in S3. This requires a service called kube2iam running in each node in your cluster. We have found this service very unreliable and have recently stopped using it.
- The third alternative is to use Kubernetes service accounts that have specific rights. Until Spark 3, it wasn’t possible to set a separate service account for Executors; however, we have now found that this is the most reliable and secure way to authenticate.
The second part of the S3 access is to set up a Hadoop file system implementation for S3. AWS Java SDK has an implementation for S3 protocol called s3a. It works very well except it breaks the commonly used protocol name ‘s3’. For a long time we had some internal mappings to allow users to use s3:// URIs that were internally translated to s3a://. Then, we realised you can set a specific file system implementation for any URI protocol. This magic made all the mappings unnecessary:
"--conf", "spark.hadoop.fs.s3.impl=org.apache.hadoop.fs.s3a.S3AFileSystem"
We instructed Spark to use the s3a file system implementation for S3 protocol.
Notebooks on S3
Many of our Researchers and Data Scientists need to take a closer look at the data we process and produce. Due to the size of the data and to maintain a high security standard, the data needs to be saved in S3. Jupyter notebooks are an industry standard for investigating and running experiments, and we wanted a seamless experience where a notebook could be run on Kubernetes, access all the data on S3, and run Spark workloads on Kubernetes.
Our solution for this is a custom Helm chart, which allows users to start and stop their own private instance. These notebooks are backed by S3, and preloaded with our mono-repo, Rex. Rex provides a helper function which provides a Spark Session with any number of Executors, set up to run on Kubernetes just like the rest of our production workloads.
Conclusion
Running Spark on Kubernetes is extremely powerful, but getting it to work seamlessly requires some tricky setup and configuration. However, once it is working well, the power and flexibility it provides is second to none.
Back to blog post and videos